.png?width=75&height=75&name=4.0%20(7).png)
Why review readiness matters
Teams using QVscribe often ask the same question: How do we know when a document is ready for review or sign-off?
Individual requirement scores are helpful, but reviewers and leadership need a complete picture of overall progress and reduced risk.
Snapshots and Timelines make this possible.
They provide clear, data-driven proof that requirement quality is improving with each revision, giving reviewers confidence that the document meets agreed-upon standards.

Step 1: Capture your baseline Snapshot
Before editing or applying review feedback, take a Snapshot of your document.
This creates a record of your starting point, including:
-
Average quality score
-
Number and type of alerts
-
Configuration and glossary used
-
Who performed the analysis
This baseline gives reviewers context and helps them see how the document improves over time.

Step 2: Apply improvements and capture again
After your team applies edits or addresses reviewer comments, take another Snapshot.
QVscribe automatically connects this new version to your baseline in the Timeline view.
In the Timeline, you’ll see:
-
Higher average scores as problem types are resolved
-
Fewer low-scoring requirements
-
A histogram that shifts toward higher quality
-
A clear record of when and who made each update

🦖Coach Qrex: “An increase of 0.3 or more in average score typically indicates meaningful improvement across a document.”
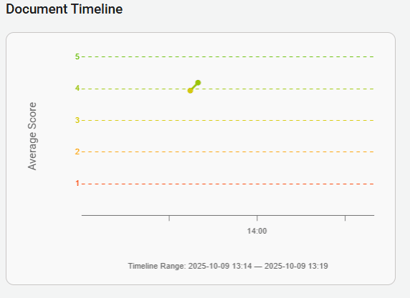
Step 3: Review your Timeline to confirm readiness
The Timeline tells a visual story of progress between versions.
When preparing for review or sign-off, look for:
-
A consistent upward trend in average score
-
Fewer recurring problem types (like “No Imperative” or “Vague Word”)
-
Most requirements scoring 4 or higher
These indicators show reviewers that your team’s process is producing measurable quality improvement.
Step 4: Share results with reviewers
Use Snapshots and Timelines in your review meeting to show evidence of progress.
Show key visuals such as:
-
The change in average score between Snapshots
-
The reduction in total alerts
-
A before-and-after view of the histogram
This lets reviewers focus on high-value discussions instead of rechecking clarity from scratch.


Readiness checklist (Example)
|
Criterion |
Recommended Goal |
|---|---|
|
Average quality score |
4.0 or higher |
|
Low-scoring requirements |
Less than 10% |
|
High-impact issues (e.g., No Imperative) |
Fully resolved |
|
Glossary and configuration |
Confirmed and aligned |
Meeting tip
When walking through Snapshots with reviewers, use a simple narrative:
-
“Here is where we started.”
-
“Here is what changed.”
-
“Here is what remains.”
This structure keeps discussions focused on measurable progress.
Key takeaways
-
Snapshots and Timelines help you prove readiness with real data.
-
Continuous tracking shows reviewers exactly how requirements are improving.
-
Visual, data-backed communication builds confidence and speeds up approvals.