Selecting your Requirements in QVscribe for Word
In order for QVscribe to analyze your requirements, you must first add them to the QVscribe environment. This can be done in three ways:
I. Manually highlight each requirement and add it
II. Use Find Requirements to automatically detect the requirements based on a few initial examples you give it.
Manually adding requirements
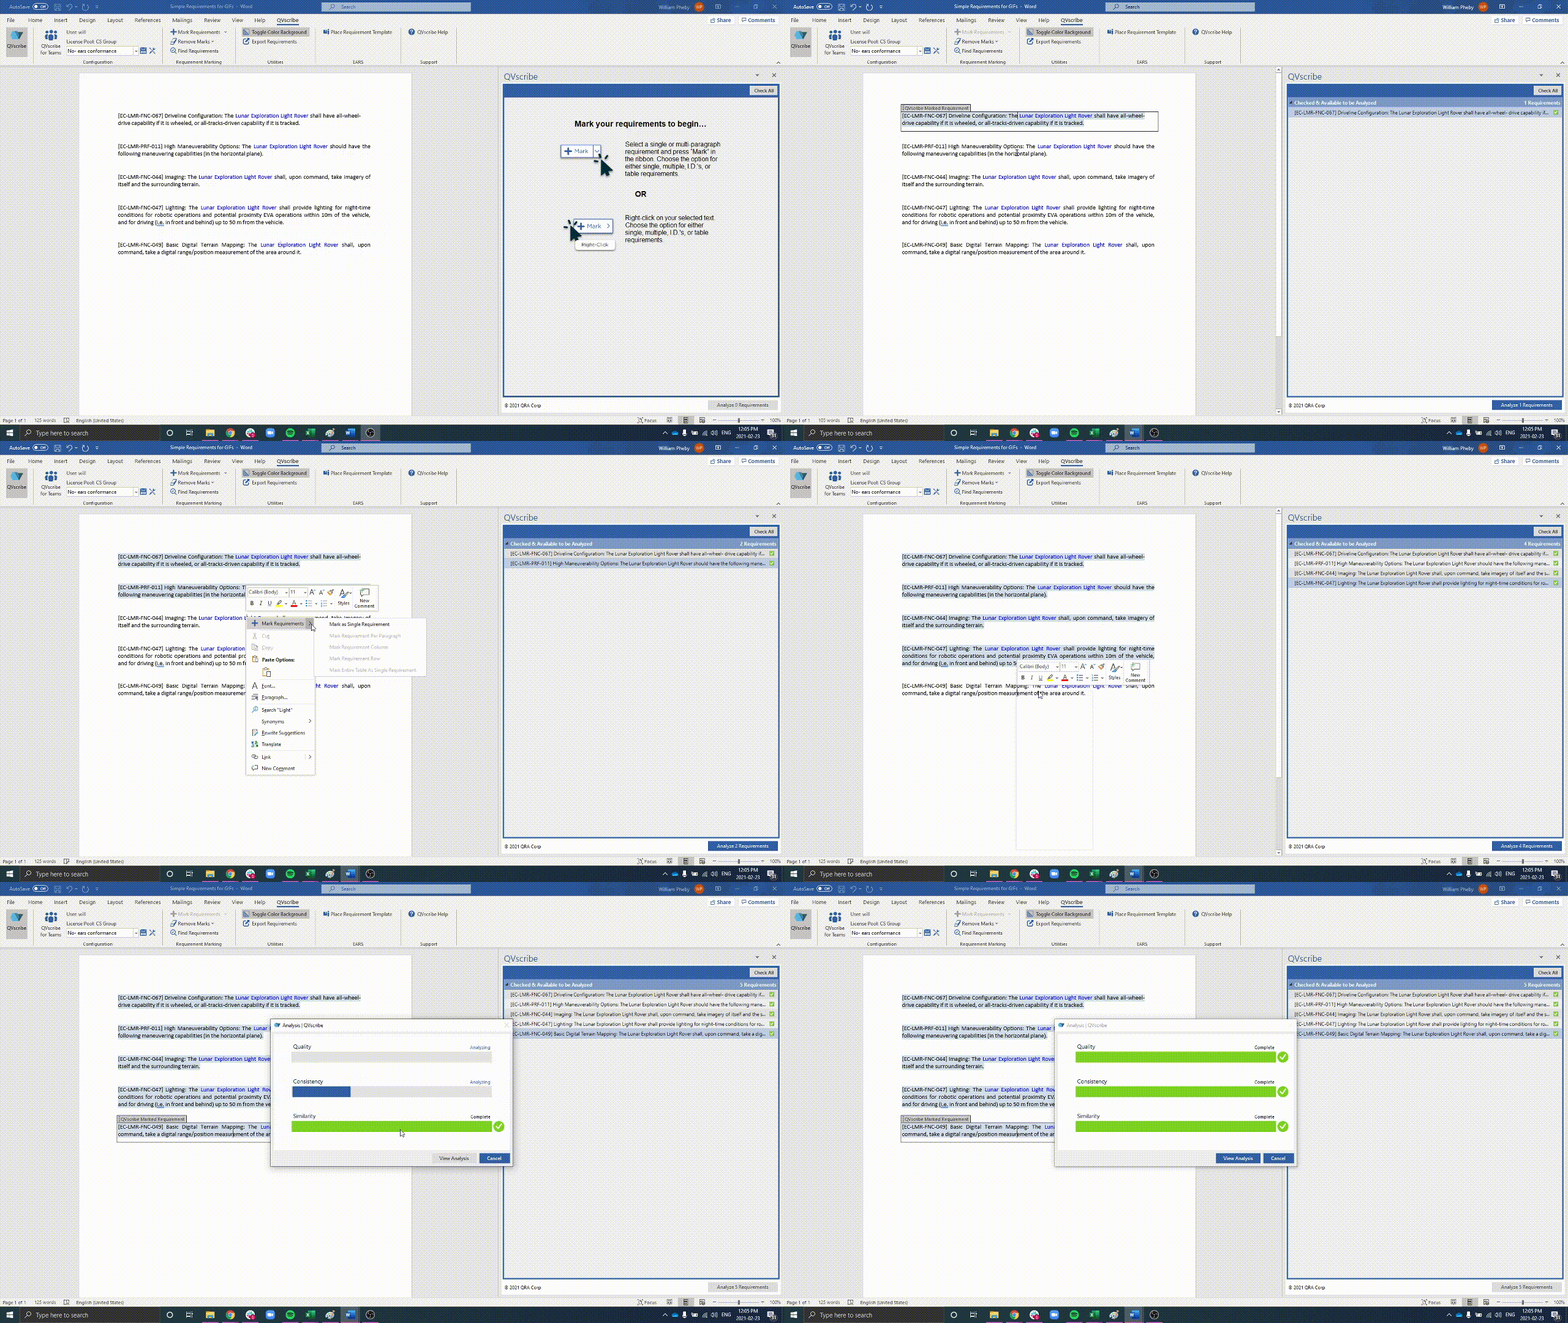
I. Right-click the mouse and select ‘Mark Requirements’.
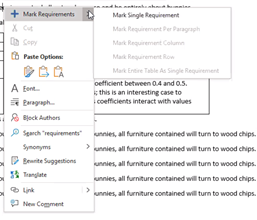
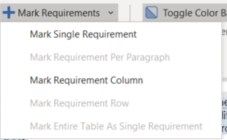
You will have the following options:
· Single Requirement
· Requirement Per Paragraph
· Requirement Column
· Requirement Row
· Entire Table As Single Requirement
QVscribe will provide you with options to mark your requirement. Only the options available will be accessible to select.
Note that in QVscribe for Word 3.3 version and above you can no longer double-click a requirement to mark it.
These manually added requirements are immediately placed in the Checked and Available to be Analyzed list, and as the name states, they are ready to be analyzed.

Marking a Table
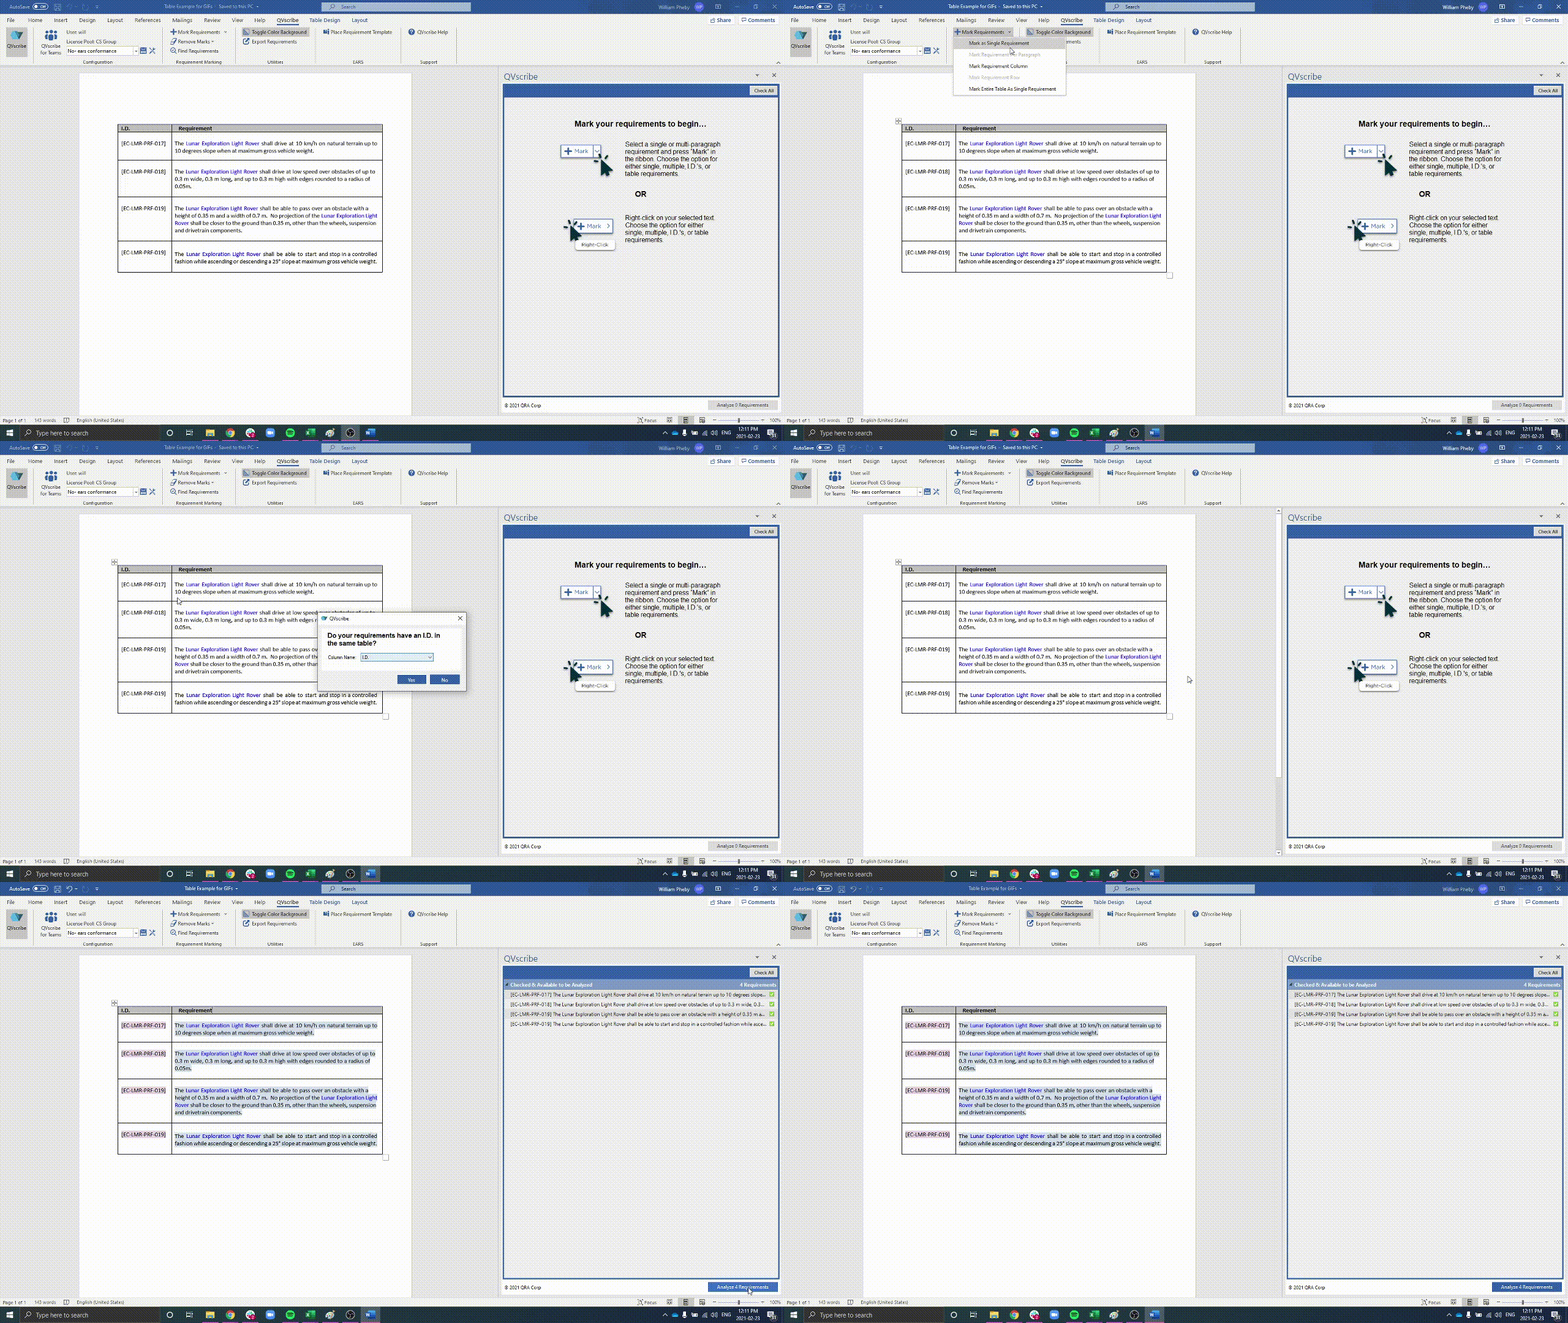
To add a requirement within a requirement, you can perform the following steps:
I. Right-click the mouse and select ‘Mark Requirements’.

II. Use the ‘Mark Requirements’ button on the QVscribe ribbon.
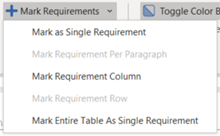
You will have the option to Mark:
· Single Requirement
· Requirement Per Paragraph
· Requirement Column
· Requirement Row
· Entire Table As Single Requirement
QVscribe will provide you with options to mark your requirement. Only the options available will be accessible to select.
Once you have selected your requirement (or requirements), QVscribe will ask if the table has a column has a requirement I.D. column. QVscribe will list the other columns in the table is a drop down for you to select.
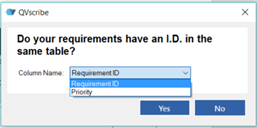
QVscribe will then populate the Checked & Available to be Analyzed list according to the table details.

Using Requirements Finder
QVscribe for Word includes a requirements auto-detection feature called Requirement Finder that helps you rapidly locate and highlight all requirements in the document. The found requirements can be reviewed before marking them for analysis.
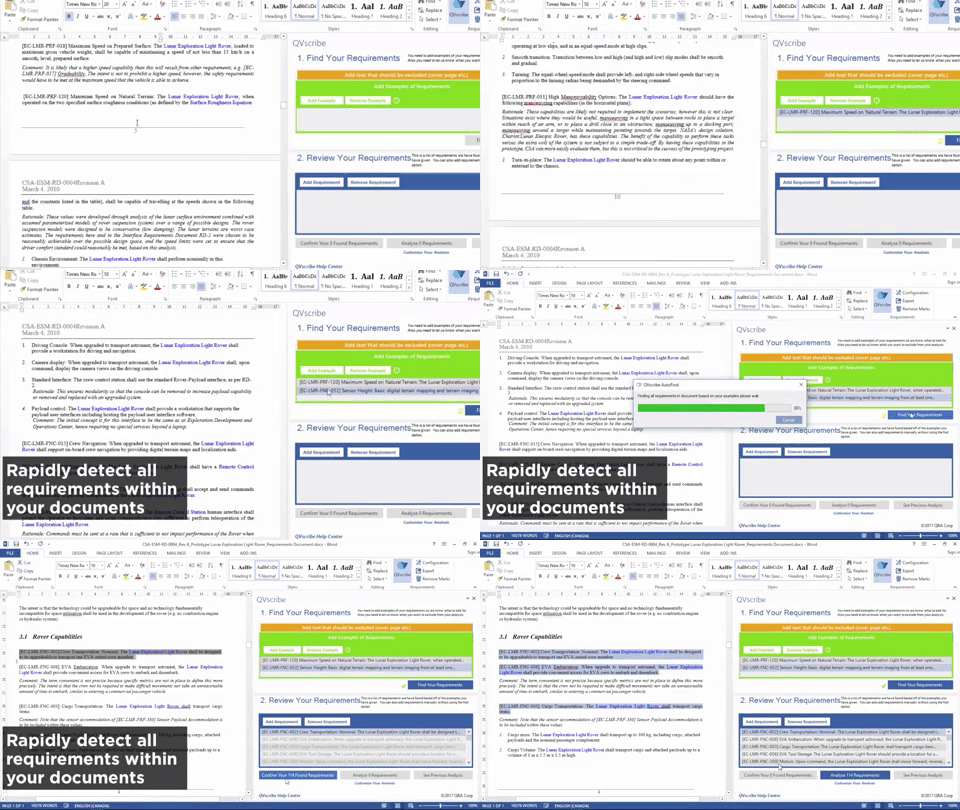
How it works: Requirements Finder looks specifically at patterns in the requirement identifiers of the sample requirements you initially selected and uses these patterns to find the remaining requirements.
For this reason, it is best if the requirements in the document have alpha-numeric requirement identifiers preceding them, such as R10.3, 2.3.34.2, 10T-34R, and Req. The example below demonstrates a typical sample of requirements with good identifiers:
[EC-LMR-RCS-030] Remote Commanding: The Remote Control Station shall accept and send …
[EC-LMR-COM-020] Delay Tolerance: The Lunar Exploration Light Rover control shall …
[EC-LMR-FNC-012] Power-up: Upon command, the Lunar Exploration Light Rover shall …
From these samples, Requirement Finder infers the common pattern ‘[EG-LMC-’ and uses it to search for other requirements in the document that begins with that same pattern.

What you do: Select 3 well-spaced requirements to set a proper pattern, then select
.png?width=75&height=75&name=4.0%20(7).png)