Selecting your Requirements in QVscribe for Excel
In order for QVscribe to analyze your requirements, you must first add them into the QVscribe environment.

This is done either by:
- Selecting a cell (or an entire column containing requirements) and pressing the Mark Requirement button on the QVscribe Ribbon


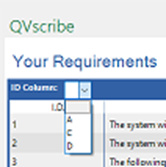
It is important to define the column containing the requirement ID for these to be preserved with the analyzed requirements, this is done by assigning the column number in the QVscribe Window.

If the Excel workbook has multiple sheets with requirements, the requirements are added per each active sheet. Once requirements from more than one sheet have been added to the list, you can select to view the list of requirements for all sheets or only for the active sheet as shown below.

Note that selecting a requirement from the list will also select it from the corresponding cell in the worksheet. The total count of requirement in the Your Requirements list to be analyzed will be shown in the Analyze button under the list.
.png?width=75&height=75&name=4.0%20(7).png)