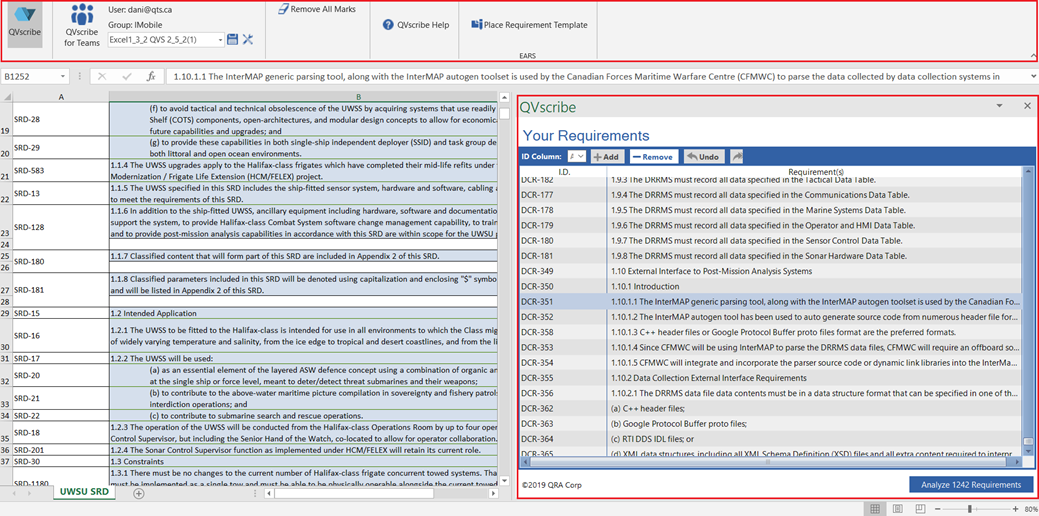
Once the QVscribe for Word add-on has been successfully installed and activated, you will see the QVscribe toolbar as a new tab in the Excel ribbon
From left to right in this toolbar the buttons function as follows:
“QVscribe” - opens/closes the QVscribe pane (see below).
- Configuration
- User: (User’s ID)
- License Pool: (License Pool ID)
- Pull-Down List – Shows the available QVscribe analysis configurations for the user alongside save and edit buttons. In QVscribe for Teams, these buttons may or may not be available to all users, depending on the team permissions that are set. This section also contains the “Refresh Configuration”, and “Delete Configuration” should the user have appropriate permissions to do so.
- Requirement Marking
- Mark Requirements – Provides a list of options for marking your requirements
- Remove Marks – Clears any existing QVscribe metadata from the document
- Utilities
- Toggle Color Background – Turns on/off the marked requirement highlighting within the document.
- EARS
- Place Requirement Template (QVscribe for Teams only) - This feature allows you to choose from 12 types of the Easy Approach to Requirement Syntax (EARS) templates
- Support
- “QVscribe Help” - opens a window to access the QVscribe Help Center, log files and telemetry data
The QVscribe pane appears initially* on the right-hand side of your Word screen (see image below). From the QVscribe pane, you select and navigate requirements, view analysis results, and generate reports.
*Note that the QVscribe pane can be undocked and moved to any of the other sides of the Word window by simply dragging it from the top section of the pane to a new side. The undocked QVscribe pane can also be left as a floating window on your screen or moved to a second screen to maximize the document view.

.png?height=120&name=4.0%20(7).png)